CDHM The Miniature Way
November 2010, Issue 10
Tutorial: Carved Chicken
Page 96


Photographs and
How-to by
IGMA Fellow Linda Cummings
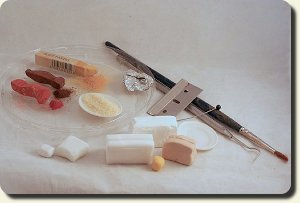
► Fimo© Classic: Polymer Clay
- Champagne 02
- Translucent 00
- White 0
- Yellow 1
► Fimo© Soft: Polymer Clay
- Champagne 70
- Translucent 014
- White 0
- Yellow 15
► Artist Pastels
- Ochre
- Raw Umber
- Terracotta
► Semolina For Texture
(http://en.wikipedia.org/wiki/Semolina)
► Tools
- Tin Foil, Pin, Dental Pick (Optional), Razor Blade: Single Sided Type, Soft Bristled Paintbrush,
Cocktail Stick (With One End Broken Off), Baking Tray: Foiled & Kitchen Paper-Lined For Baking, and
Your chosen platter to display your chicken!
Note: Using a pasta machine will speed this up for you! If you feel that the mix is too dark, add ½ + ½ more translucent and white clay until you achieve a colour you are happy with.
Note: Do not add the semolina near your work area, otherwise you’ll find annoying bits of it in everything you do for quite a while afterward!!
November 2010, Issue 10
Tutorial: Carved Chicken
Page 96


Photographs and
How-to by
IGMA Fellow Linda Cummings
Let's learn the techniques used for making a carved chicken in 1:12 scale. Linda Cummings, IGMA Fellow will walk you through step-by-step instructions on how you can make your own carved chicken.

Materials Needed
► Fimo© Classic: Polymer Clay
- Champagne 02
- Translucent 00
- White 0
- Yellow 1
► Fimo© Soft: Polymer Clay
- Champagne 70
- Translucent 014
- White 0
- Yellow 15

► Artist Pastels
- Ochre
- Raw Umber
- Terracotta
► Semolina For Texture
(http://en.wikipedia.org/wiki/Semolina)
► Tools
- Tin Foil, Pin, Dental Pick (Optional), Razor Blade: Single Sided Type, Soft Bristled Paintbrush,
Cocktail Stick (With One End Broken Off), Baking Tray: Foiled & Kitchen Paper-Lined For Baking, and
Your chosen platter to display your chicken!

Step 1
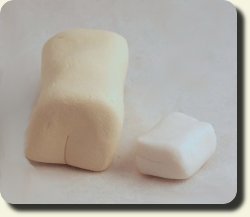
Mix approximately 8mm (or approximately 1/3") of white clay and 16mm (or 2/3") of the translucent clay for the body carcass of your chicken. Condition and mix beige, translucent, and white (1:1:2) clay with a tiny touch of yellow clay to make a creamy coloured mixture.
Note: Using a pasta machine will speed this up for you! If you feel that the mix is too dark, add ½ + ½ more translucent and white clay until you achieve a colour you are happy with.

Step 2
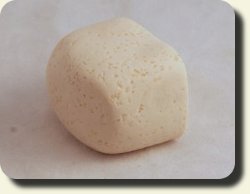
Now take the semolina and mix it into your creamy coloured clay. An easy way to do this without getting semolina everywhere, is to put the semolina in a small plastic bag and squish your clay into it – then work the clay over a bin to catch the excess semolina.
Note: Do not add the semolina near your work area, otherwise you’ll find annoying bits of it in everything you do for quite a while afterward!!
Copyright© 2010
Custom Dolls, Houses & Miniatures / CDHM
Custom Dolls, Houses & Miniatures / CDHM


