


Making a Miniature Bed by Debra Dinges
Materials Needed:
- 4 - 4.75" pieces stair railing
- Small mini miter box and saw
- Pencil
- Pin drill
- Ruler
- Cutting mat with measurements (not required but very useful for straight gluing)
- Package of newel posts (or use wooden Chinese chopsticks!)
- Miscellaneous small wood scraps
- 1-2 packages of 1" scale stair rail
- Several toothpicks (square cut recommended)
 1. You will need a pin drill, miter box and saw, a ruler, toothpicks (square cut recommended), a cutting mat with measurements (not required but very useful for straight gluing), miscellaneous small wood scraps, a package of newel posts (or use wooden Chinese chopsticks!), and 1-2 packages of 1" scale stair rail.
 I am using unfinished wood for these instructions. If you want to use a wood stain and/or polyurethane finish on your bed, do the staining first to avoid running into difficulties with unsightly areas where the stain will not penetrate glue marks. Enlarge Picture of the materials needed.
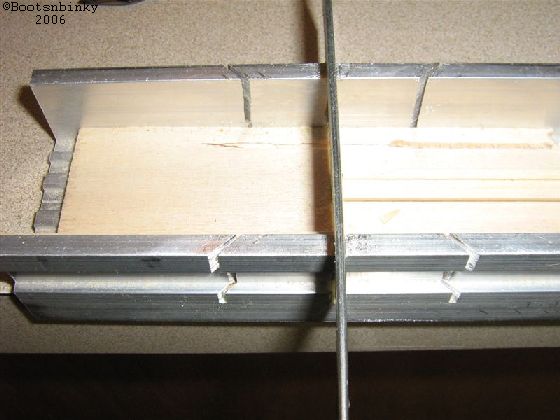
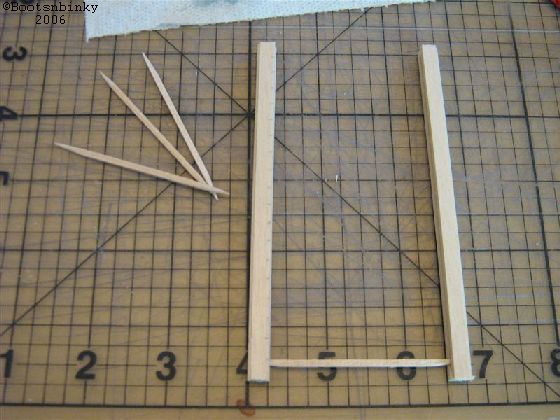
 2. Cut 4 4.75" pieces from the stair rail. A mini miter box and saw are handy too.
Enlarge Picture of cutting the wood.
2. Cut 4 4.75" pieces from the stair rail. A mini miter box and saw are handy too.
Enlarge Picture of cutting the wood.
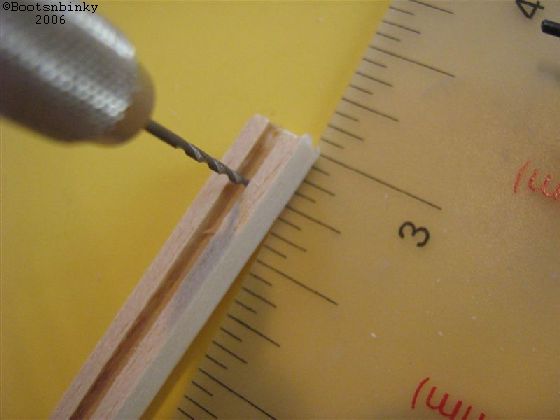
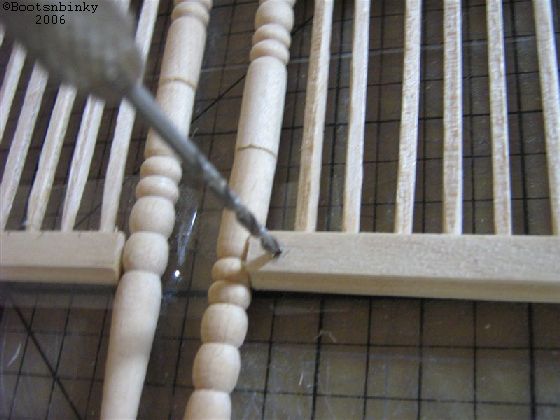
 3. Using a pencil mark each 4.75" piece every 1/4". Using the pin drill, carefully drill a shallow hole on the UNDER side of the stair rail. You do not want the hole to go all the way through the wood but you do want enough depth to position and glue in a toothpick. (If you want to position your toothpicks differently, please do the math to make sure you have at least 1/4" left on either side.)
Enlarge Picture of drilling the slots.
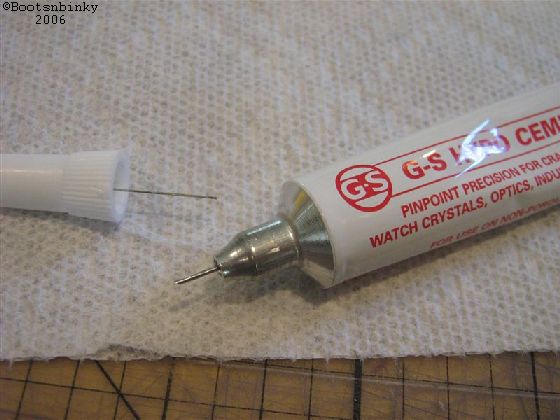
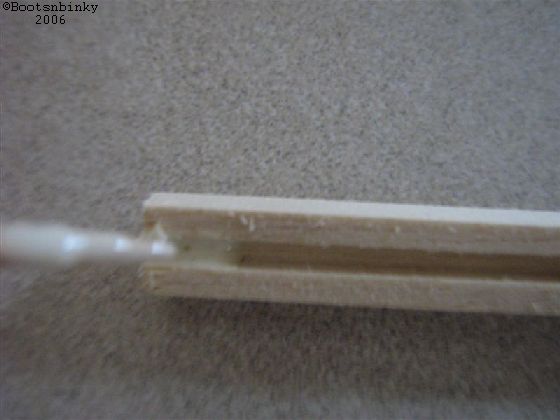
 4. You can use your glue of choice for this next step, but make sure it is not water soluble glue. Squeeze some wood glue into a little 'puddle' and use a toothpick to apply it. (I'm using a craft glue with a tiny applicator, which I like to use to get started - just a personal preference.) I use a Fiskars self healing craft mat for accurate positioning of the toothpicks because it has the grid lines for measurements.
Enlarge Picture of gluing and mat.
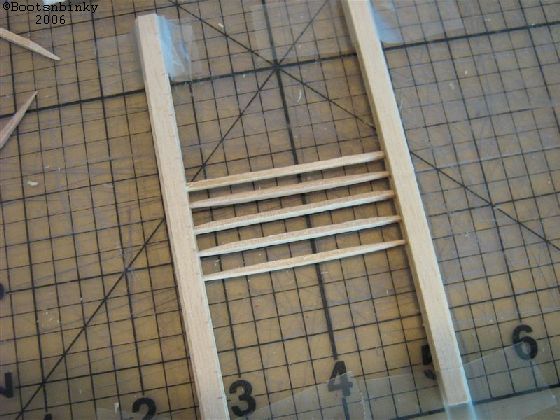
 5. Glue each end of the toothpick into the holes you drilled. This part can get frustrating because you have to work before the glue dries. You are also going to find out that your toothpicks may have tiny variations in size and length and your holes are drilled at different depths.
Enlarge Picture of gluing the toothpicks.
5. Glue each end of the toothpick into the holes you drilled. This part can get frustrating because you have to work before the glue dries. You are also going to find out that your toothpicks may have tiny variations in size and length and your holes are drilled at different depths.
Enlarge Picture of gluing the toothpicks.
 6. Don't despair! It helps to insert and glue about 4-5 toothpicks in the center portion and letting them dry several hours before continuing. Once it's dry, you can slide in the toothpicks at an angle and settle them in more easily. Treat your "drill holes" as guides, not absolutes, and if you can't get them all into the holes, the glue and the 'gutter' on the rail will hold them in place. Just make sure each toothpick is placed as exactly as possibly.
Enlarge Picture of gluing and drill holes
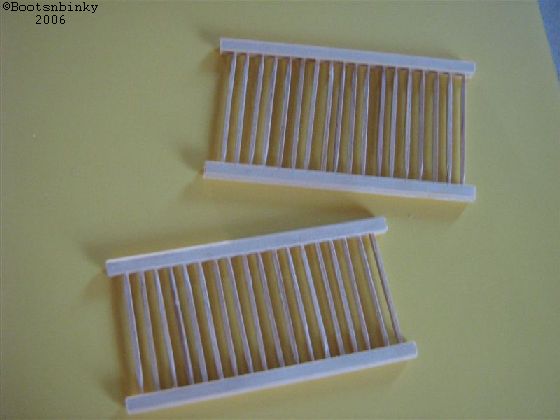
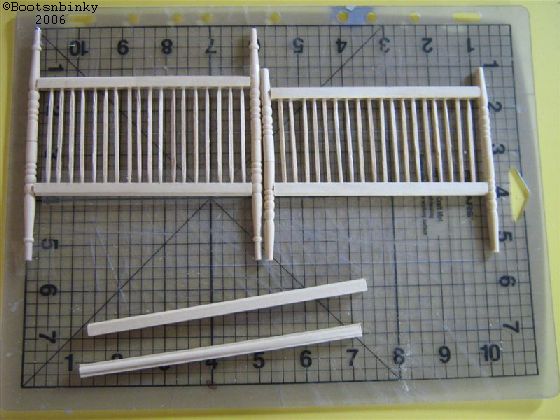
 7. Once you are done, you will have two 'grids'. (With a potential to make other things! - i.e. playpen, porch railing, etc.) Notice that mine are the same size. I'm building a slightly different bed from the one in the original picture, with a decorative element to be added to the top of the headboard. You will probably want to cut down your toothpicks to half size for the footboard.)
Enlarge Picture of the two grids.
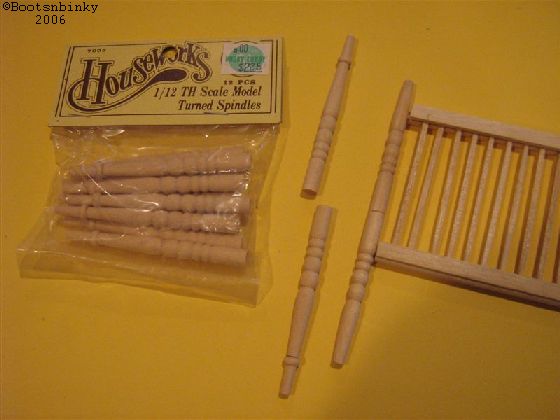
 8. For the headboard, you will need four turned spindle newel posts. (Remember, you can substitute wooden chop sticks if preferred.) I use Houseworks #7009.
Enlarge Picture of the bed post materials.
8. For the headboard, you will need four turned spindle newel posts. (Remember, you can substitute wooden chop sticks if preferred.) I use Houseworks #7009.
Enlarge Picture of the bed post materials.
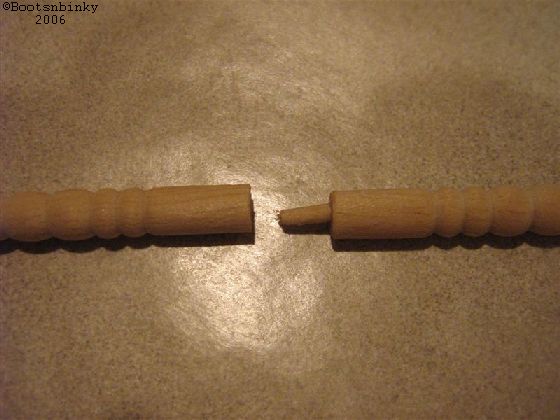
 9. Drill holes in the top of each post, about 1/4" deep. Dry fit a piece of toothpick in the hole of one post; check to make sure the posts line up.
Enlarge Picture of Drill holes for bed posts.
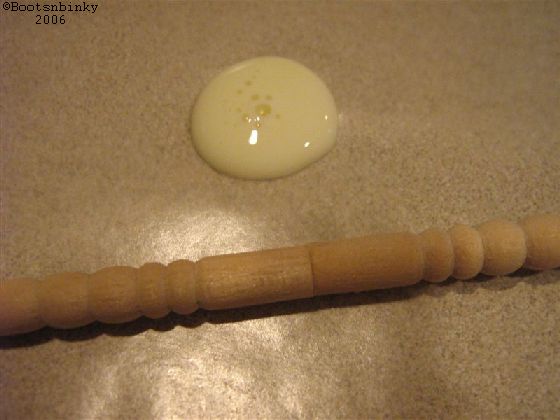
 10. Once things look lined up, dab a bit of wood glue in the holes, insert toothpick bit, and attach the second post. Allow to dry for a few hours. (The blob of yellow stuff in the picture is glue.) For the footboard posts, follow the same instructions, but cut off the newel posts tips (or leave them if you want all four posts to be the same height.)
Enlarge Picture of how to glue the posts.
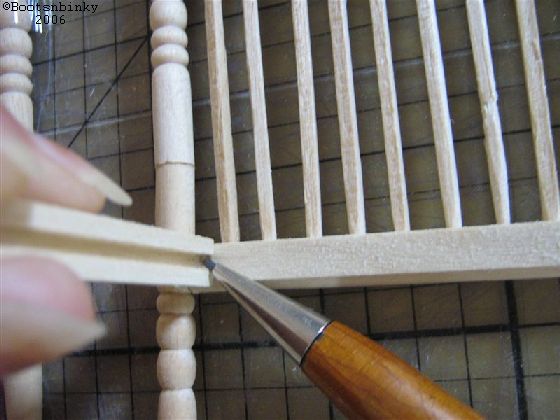
 11. Use sand paper wrapped around a pencil to sand the ends of the head and foot boards. Dry fit the posts to the boards and adjust your sanding accordingly. Once they are fitted, glue in place and allow to dry 24 hours. (Hint: Use a grid mat to make insure everything is 'squared up'.)
Enlarge Picture of Gluing the Bed Posts to the Head and Foot Boards.
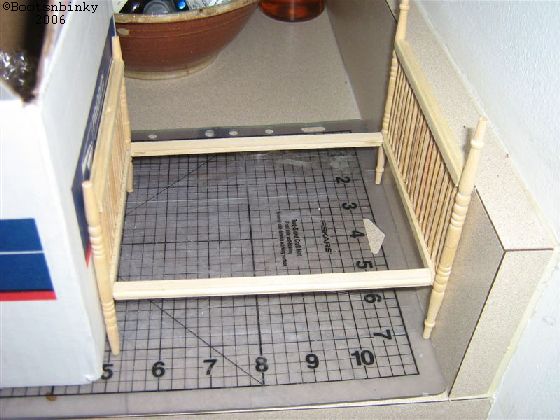
 12. While the glue is drying, cut two 6" lengths of rail. These will be the sides of the bed.
When the glue is dry on your head and foot boards, use one of the rails to mark a spot for pin drilling. (We're going to use a tiny bit of toothpick as a dowel to add a bit of stability to the bed.) We are going to mount the side boards of the bed with the slotted part of the rail facing inward. (These slots will be handy for slipping in small flat pieces of wood for the bed slats.)
12. While the glue is drying, cut two 6" lengths of rail. These will be the sides of the bed.
When the glue is dry on your head and foot boards, use one of the rails to mark a spot for pin drilling. (We're going to use a tiny bit of toothpick as a dowel to add a bit of stability to the bed.) We are going to mount the side boards of the bed with the slotted part of the rail facing inward. (These slots will be handy for slipping in small flat pieces of wood for the bed slats.)
Enlarge Picture of sides of the bed.
 13. Carefully drill holes through the first layer of the bottom rail of the head and footboards on the mark that you made.
Using the pin drill. Notice the hole is located on the lower rail of the head board, not on the post. We want to mount the side boards so they don't stick out too far on the sides, which would interfere with the draping of a bedspread.
13. Carefully drill holes through the first layer of the bottom rail of the head and footboards on the mark that you made.
Using the pin drill. Notice the hole is located on the lower rail of the head board, not on the post. We want to mount the side boards so they don't stick out too far on the sides, which would interfere with the draping of a bedspread.
Enlarge Picture of Preparing to join head and footboards.
 14. Dry fit a piece of piece of toothpick in each hole and the slot of your side rails.
Enlarge Picture of dry fitting side rails.
 15. Once you are satisfied, dap a bit of glue in each hole and in the end portion of the side rail and glue everything into place.
Enlarge Picture of gluing side rails.
 16. Prop your bed between a wall and a box to keep the frame square and upright in the correct position while it is drying.
Enlarge Picture of drying set-up.
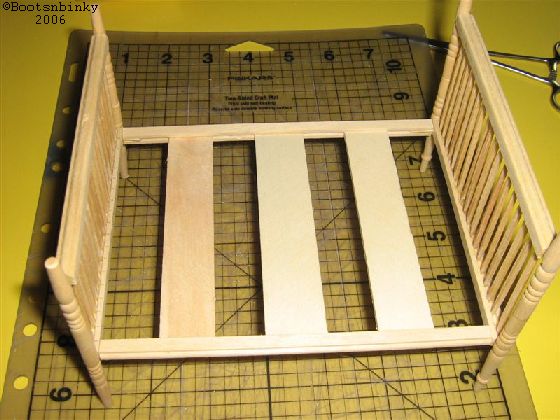
 17. Once your frame is dry, it is time to add slats for the support of a mattress. I fit three small pieces of wood to the bed and saw down and whittle the ends until they can easily fit into the slot on the side of the rails.
Enlarge Picture of making the slats.
 18. If you prefer, you can glue the slats directly to the top of the rail.
Enlarge Picture of placing the slats.
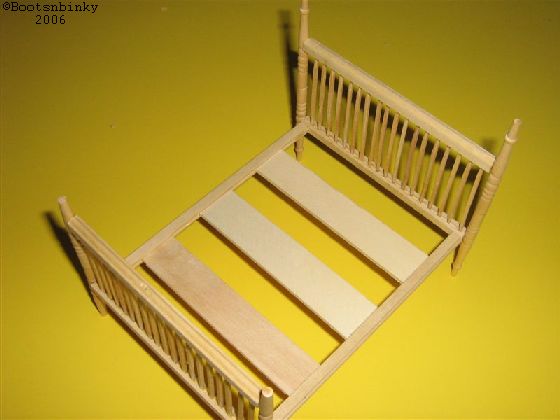
 19. Your bed is complete.
Enlarge Picture of completed miniature bed.
TIP:
Finishing and a mattress. Now you can paint or stain the bed to complete the look. I like to cover a piece of fitted styrofoam with mattress ticking fabric. You might also consider adding fancy beads to the top of the bed posts as finials.
MEET THE ARTIST
Debra Dinges has been making miniatures for 19 years (since her husband surprised her with her first dollhouse one magical Christmas).
Deb is a valued member of the CDHM Forums. Visit the Galleries today.
Debra Dinges has been making miniatures for 19 years (since her husband surprised her with her first dollhouse one magical Christmas).
Deb is a valued member of the CDHM Forums. Visit the Galleries today.
© 2006-2012 Debra Dinges and CDHM.org
Reproduced with permission from Debra Dinges. All photographs and text appearing in this tutorial are the exclusive property of Debra Dinges.
Permission is explicitly denied for any republication of text or photographs in this article without the prior express written consent of the author.
Permission is explicitly denied for any republication of text or photographs in this article without the prior express written consent of the author.