Learn To Sculpt
Pumpkins
in 1:12 Scale
with IGMA Artist
Sandra Keller Palesch
Materials Needed
- Polymer clay for Pumpkins
- Sculpey� in 'Sweet Potato' ~ makes a deep orange pumpkin
- Premo� in Cadmium Yellow ~ mixed with equal parts of Sweet Potato makes a medium orange pumpkin
- Mix 2 parts Cadmium Yellow with 1 part Sweet Potato for a light orange Pumpkin - Clay Mixture for Stems
- Premo� Ecru
- Premo� or Fimo� Translucent
- An alternative for the stems you can us twigs that are light-colored if you'd prefer - Ceramic tile
- Uncoated Paper Plate
- Cornstarch
- Ball Stylus
- Small
- Medium - Straight pin
- Razor Blade
- Brush
- For Artist Pastels or chalks
- For varnish - Artist Pastels\Chalks:
- Brown
- Dark Olive Green
- Light Olive Green
- Yellow-Orange
- Ivory (optional, but helpful)
Think of the colors on a pumpkin stem when selecting your chalk colors. Stems can vary from light brown, dirty ivory, mossy green to grey-greens - Liquid Fimo
- Toothpick
- Varnish: Matt & Medium varnish
- Water (for thinning varnish)
- Tweezers
- Future� Floor Wax
- Course Sandpaper
 Close-up images of materials needed
Enlarge picture of basic supply requirements
 1. Here are some of the clays and combinations of clays I use to make
pumpkins:
- Sculpey�'s Sweet Potato
- Approximately 1/8 of the 'Sweet Potato' and 7/8 of the Premo� Cadmium Yellow
- About � Sweet Potato and � Cadmium Yellow
- Equal parts Sweet Potato and Cadmium Yellow
Clay Mixture for the Stems (unless you intend on only using twigs for a stem)
- Equal parts Translucent (any brand) and Premo� Ecru
Thoroughly mix whichever color combinations you'd like and set aside.
Enlarge picture showing clay color combinations
TIP
Sculpey� has great colors of clay but they tend to be quite soft and can get sticky with a lot of handling or if you have warm hands. Placing the clay in the freezer for a few minutes will make it much easier to work with.
You can also put a bit of cornstarch on your hands to help keep the clay from sticking.
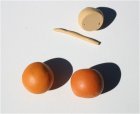 2. Roll the pumpkin clay into approximately � inch balls and the stem clay into snakes about 1\8 inch round.
Enlarge picture showing size to roll
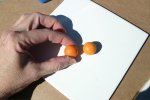 3. If you prefer your pumpkin to have a more 'flat top and bottom' squeeze the clay between your index finger and thumb. The other ball is for a more 'rounded' pumpkin.
Enlarge picture showing cut pieces
TIP
If you have a ball stylus tool you know that each end has a ball at the tip. One is larger than the other. I have 2 such tools. One has a large ball tip on one end and a medium ball tip at the other end. The other ball stylus has a small ball tip and again the same medium ball tip. I use them interchangeably depending on the size of what I'm making.
What you do you if you don't have one of these snazzy tools? Any small tipped implement that can create a nice little concave will work nicely. But do get yourself one of these tools (or both) and you'll find all kinds of uses for them.
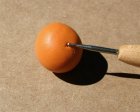 4. For these pumpkins I used the Small/Medium tips and just slightly indented where I wanted the stem to be and the blossom end. The photo below shows the small ball tip making marking the end. I used the medium ball tip to mark the opposite side for the stem.
Enlarge picture showing where to use the ball stylus
 5. Result of marking with the ball stylus.
Enlarge picture showing results of ball stylus
TIP
Remember, that pumpkins come in a variety of sizes, shapes, colors. Ribs themselves can be very deep to hardly noticeable ~ and everything in between. Think about how the ribs are most often haphazard in their placement. While they always go in the same direction the spacing is usually random. Some pumpkins do have a more defined spacing like the real-life miniature Jack-be-Little pumpkins.
Remember, that pumpkins come in a variety of sizes, shapes, colors. Ribs themselves can be very deep to hardly noticeable ~ and everything in between. Think about how the ribs are most often haphazard in their placement. While they always go in the same direction the spacing is usually random. Some pumpkins do have a more defined spacing like the real-life miniature Jack-be-Little pumpkins.
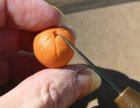 6. Now we are going to sculpt the pumpkin's ribs. Before making the ribs expand the hole for the stem using a tool similar to the one in the photo. Make it deep enough to anchor the stem ~ at least 1/8th of an inch but not too much deeper. Using a tool similar to the one in the photo (a toothpick or straight pin also work fine) place the pointy end at the top of the pumpkin near the stem's opening. Depending on how deep you want the ribs lay the tool down and press into the clay while guiding it all the way down to the blossom end.
Enlarge picture showing how to make the ribs
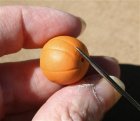 7. Do this all the way around the pumpkin. Don't worry if the ribs lose some definition while handling the clay. We will come back and give them a final definition before curing them.
Enlarge picture showing how to make the ribs all the way around
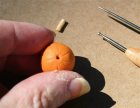 8. For the stem slice a piece of clay about a � inch long. Lift the piece of clay off the tile with your razor blade and carefully set it into the stem's hole. You may need to adjust the hole's opening to accommodate the stem. If the stem seems too large or even too small for the size of the pumpkin you may need to roll and slice another piece of clay.
Enlarge picture showing how to make and place the stem
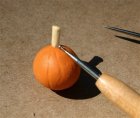 9. After setting the clay upright in the hole use the small end of the ball stylus or a blunt-ended toothpick to gently but firmly anchor the stem in place. Go all the way around nuzzling the stem in place. Doing this is two-fold: 1), it secures the stem; and 2), it gives the stem the natural roughness or lines you see on the stem of a pumpkin. This is just the beginning of how we are going to give our pumpkin's stem some character.
Enlarge picture showing how to smooth the stem
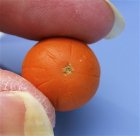 10. Since the blossom is actually the scar where the blossom's flower came off we want to texture the area. I used my dental tool that has the tiniest point and sort of roughed it up. A straight pin would work. So would a piece of sand-paper. Take a corner of the sandpaper and carefully rough up the clay a bit.
Enlarge picture showing how make the stem look natural
ALTERNATE STEM ATTACHMENT
I was in a hurry when I made the pumpkins in the photo. I'm not thrilled with how they turned out but this is for educational purposes only. What I wanted to show is, that if you are having difficulty keeping the desired shape to the pumpkin (particularly if it's really tiny like these � inches) you might want to sculpt the pumpkin and bake it.
Once it's baked and cooled you can then work with the stem and not disturb the shape of the pumpkin. Make sense?
This can be a good alternative if you find the pumpkins shape is hard to maintain while working with the stem.
To attach the stem use Liquid Fimo� in the hole before placing the uncured clay. Remember, anytime you have baked polymer clay and you want to attach uncured polymer clay you must use a liquid polymer clay as a bonding agent.
Use a tiny amount to line the hole and a bit around the rim to secure the clay in place. Once it's in place follow the method for anchoring the stem as in the previous section of Step Five.
I was in a hurry when I made the pumpkins in the photo. I'm not thrilled with how they turned out but this is for educational purposes only. What I wanted to show is, that if you are having difficulty keeping the desired shape to the pumpkin (particularly if it's really tiny like these � inches) you might want to sculpt the pumpkin and bake it.
You Must Leave A Hole For The Stem - Don't Forget!!
Once it's baked and cooled you can then work with the stem and not disturb the shape of the pumpkin. Make sense?
This can be a good alternative if you find the pumpkins shape is hard to maintain while working with the stem.
To attach the stem use Liquid Fimo� in the hole before placing the uncured clay. Remember, anytime you have baked polymer clay and you want to attach uncured polymer clay you must use a liquid polymer clay as a bonding agent.
Use a tiny amount to line the hole and a bit around the rim to secure the clay in place. Once it's in place follow the method for anchoring the stem as in the previous section of Step Five.
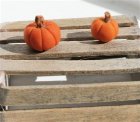 11. The pumpkin on the right was done using the method we've discussed up till now. It started out having the same shape as the one on the left ~ although it was a bit smaller. The one on the left (the alternative method)had the stem added after the pumpkin was baked.
Enlarge picture showing an alternate method
TIP
In the following steps, I've included two different methods for attaching stems to the pumpkin. The next couple of steps show a pumpkin lid receiving its stem. Because of it's small size and because it can be easily distorted while handling I prefer to bake the lid before I attempt to sculpt the stem. It's just easier for me.
In the following steps, I've included two different methods for attaching stems to the pumpkin. The next couple of steps show a pumpkin lid receiving its stem. Because of it's small size and because it can be easily distorted while handling I prefer to bake the lid before I attempt to sculpt the stem. It's just easier for me.
 12. I need to put it on some Blue Tack to hold it in place. Remember, once the clay is cured it's not sticky any more and can be a challenge to hold in place.
Enlarge picture showing how to hold the pumpkin down while sculpting
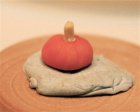 13. I use Liquid Fimo� to attach the stem to the pumpkin. See the prior steps ~ An Alternate Way to Attach a Stem for further discussion.
Enlarge picture showing the attached stem
TIP
When pressing the stem be sure to support it with a finger on the opposite side to keep the stem from being pushed over. It will move over slightly. Just push it back in place and move on.
Don't worry if the stem gets too long because we're going to cut the tip off later.
When pressing the stem be sure to support it with a finger on the opposite side to keep the stem from being pushed over. It will move over slightly. Just push it back in place and move on.
Don't worry if the stem gets too long because we're going to cut the tip off later.
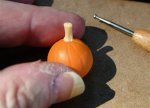 14. I use a variety of tools when sculpting the stem depending on the size of the stem or how the clay is reacting to me trying to manipulate it into my shape. As we did in the previous step the ball stylus can be used to create nice deep-rounded lines. I may then use a toothpick to create another shape as I sculpt. For smaller stems I'll use a straight pin.
Enlarge picture showing use of the stylus tool
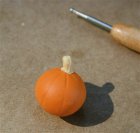 15. Once you have the line how you like them you may want to twist the stem slightly or even a lot to give a nice curve to your stem.
If the stem seems to have gotten short or thicker than you like you can elongate the clay by pushing it upwards with a blunt ended type of tool. Just turn the pumpkin around as you sort of 'knead and coax' the clay upwards.
Enlarge picture showing how to add detail
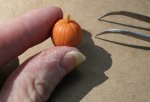 16. After all the discussion about sculpting a stem there are times when there is nothing better than a well placed twig to make your pumpkin complete. The lone pumpkin in this photo isn't one of them but I couldn't find a decent twig.
Enlarge picture discussing where to add the twig
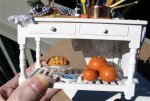 17. Here is a nicer example showing a table with a bottom shelf and three large pumpkins.
Enlarge picture displaying placement of pumpkins
 18. This photo shows the top of the table sporting a small pumpkin for decoration while two baby pumpkins are used to hold candles. I put some Liquid Fimo� on the portion of the stem that would be going into the pumpkin then baked baked it for about 20 minutes.
Enlarge picture displaying another placement of pumpkins
TIP
Now that we have the stem attached and nicely sculpted we want to add color.
Lightly dust the area you want to add the chalk\pastel to ~ on the stem and on the pumpkin itself. The cornstarch just makes it easier to apply the color evenly. Without it, I find the color really sticks to the area I first put it onto and I have a hard time getting it blended? A bit of cornstarch helps if you find the clay gets warm, soft and sticky in your hands.
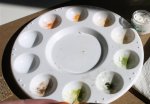 19. To add color we're going to use Artist Pastels or Artist Chalks. I prefer to work with them in a powder form so I gently scrape the sides of the pastels with a razor blade. Take care not to breath in the dust and try not to touch the pastels with bare skin. Some pastels may be made with toxic ingredients, just a precaution.
Enlarge picture showing how to prepare the chalks
TIP
Don't 'blow off' any excess pastel dust. Use a brush to gently lift off anywhere on the pumpkin you don't want to breath the pastel dust, ok? Remember, safety first.
Don't 'blow off' any excess pastel dust. Use a brush to gently lift off anywhere on the pumpkin you don't want to breath the pastel dust, ok? Remember, safety first.
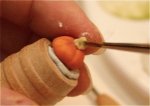 20. A Green Stem ~ Using a fine tipped paint brush I put a small amount of the darker olive green pastel and dab the stem in various spots all around the stem. I'll usually add a couple of shades of green pastel at a time. I don't know if it gives it depth but I think it does!! Blend the pastel as you go along adding color where needed.
Enlarge picture showing how to create a green stem
HOW TO CREATE A BROWN STEM
I do the same thing as the green but with a medium-dark brown pastel. You can also use a different clay mixture that I just stumbled on this week (that's why it wasn't in the supply list. I used equal parts Premo� Raw Sienna and the clay stem mixture we've been using. Blend thoroughly. It offers a very nice medium brown stem color.
I do the same thing as the green but with a medium-dark brown pastel. You can also use a different clay mixture that I just stumbled on this week (that's why it wasn't in the supply list. I used equal parts Premo� Raw Sienna and the clay stem mixture we've been using. Blend thoroughly. It offers a very nice medium brown stem color.
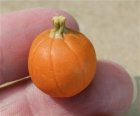 21. At some point I usually use course sandpaper to scuff or rough the stem a bit, gently though. I may deepen the lines on the stem if, the lines seem to be loosing their shape from the brush going over them. I will also often use a tiny bit of an ivory-colored pastel to add dimension to the green.
Enlarge picture showing how to course up the stem
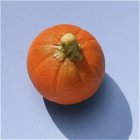 22. Here I've got it colored just about right. Notice, I did add a bit of the green coloring to the pumpkin itself. I just dipped my brush into the green powders and then tapped it on the side of my dust dish to shake a bit of the powder off. The reason I do this is I don't want to have a big 'glob' of pastel powder on the brush when I touch the clay. I only want to add a bit of color at a time. More color can be added if there isn't enough. It's always easier to ADD color than to take color away, right? Go around the pumpkin touching the brush to the orange clay (closest to the stem, in this case). Blend the pastel to create a realistic effect.
Think of putting on blush or rouge. Once you have the color on your cheeks you want to blend or feather the color to reduce the intensity of the color (usually, right?). We want to do the same thing with the color we added to the pumpkins skin.
Enlarge picture showing how to refine the highlights of the pumpkin
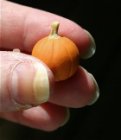 23. Here is the pumpkin so far.
Enlarge picture showing progress so far
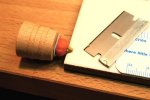 24. No matter how long, short, narrow or wide you want the stem to be it will look more realistic if the tip is cut off exposing the inside.
Lay the stem like in the photo and quickly lop off the tip. Try not to crush the side against the tile or all your work sculpting the stem may need to be redone. We need to cut the tip off the stem before we can texture it.
Enlarge picture showing how to cut the stem
 25. Yes, I know this is a terrible photo but it shows how I use a very fine, pointy dental tool to rough up the stem's blunted end.
Enlarge picture showing how to rough up the stem
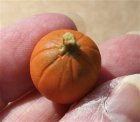 26. You can also use a straight pin to poke fine little holes randomly in the tip. I also use a razor the make indentations in the sides at the top of the stem so it isn't perfectly round.
Enlarge picture showing how to use the razor to define stem
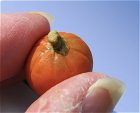 27. To finish off the coloring I use the ivory-colored pastel on the tip. It adds just the right color and texture to the stem.
Enlarge picture showing where to add the ivory-colored pastel
 28. Now is the time to go back and look at your pumpkin and see what ribs, if any, need to be redefined, etc. When you are happy with your masterpiece place it on an uncoated paper plate and bake in a preheated oven at 250-275 degree for 20 minutes.
Enlarge picture showing final steps before baking
TIP
Whenever you don't want your item ~ in this case a pumpkin ~ to have a 'shiny bottom' place it on an uncoated paper plate to bake it. Using the ceramic tile will make it shiny.
Whenever you don't want your item ~ in this case a pumpkin ~ to have a 'shiny bottom' place it on an uncoated paper plate to bake it. Using the ceramic tile will make it shiny.
 29. After the pumpkin is cool you can add whatever amount of shine you'd like or not. In this photo I've applied a thin coat of Future� Floor wax on the pumpkin. That's right.....floor wax. This clear floor wax is so thin it is a great choice for any item that you want to have a very thin coating of varnish. You can also use a matte or medium gloss varnish. I happen to think high gloss makes the pumpkin look like plastic. Don't apply varnish\wax to the stem, though? Stems are not shiny in real life.
That's it.... I hope you have fun making your sweet little pumpkins!!!
Enlarge picture showing how to use floor wax
MEET THE ARTIST
 IGMA Artist, Sandra Keller Palesch creates realistic 1:12 scale miniature pastries, cakes, pies, cookies -- in other words delicious sweets and desserts! She also creates breads so realistic you can almost smell that fresh and warm aroma straight from the oven! Inaddition, Sandi has incredible fruits & vegetables of every variety. She's been creating collectible miniatures since 2003 and in May 2006, she achieved Artisan status in the International Guild of Miniature Artisans (IGMA) for her food creations. Since that time, she has been an active contributor in American Miniaturist magazines on numerous 'how-to' articles.
Sandi is a valued member of CDHM and a moderator in the Forums. Visit the Galleries today.
© 2007-2012 IGMA Artisan Sandra Palesch and CDHM.org
Reproduced with permission from Sandra Palesch. All photographs and text appearing in this tutorial are the exclusive property of Sandra Palesch. Permission is explicitly denied for any republication of text or photographs in this article without the prior express written consent of the author.


