


Learn Alternate
Sculpting Tools
by Tony Rice
Materials Needed:
- X-Acto� Knife
- Pink Pointed Pencil Eraser
- Super Glue�
- Pencil
- Pairing Knife
- Knitting Needles
- Nut Pick
- Cuticle Pushers
- Blackhead Tool Remover
- Filbert Brushes
Overview
The expense? Well, sculpting tools are expensive. At most craft stores you can buy various medium quality (if you are lucky) sculpting tools for anywhere from $5.00 to $10.00 dollars. Sometimes you can find a package of various poor quality tools for $15.00 - $25.00. So called �professional� sculpting tools can cost over $15.00 each!
The zinger is that you might only use your tools once or twice and then decide that you don't like sculpting. Or you might realize that you love sculpting, but you only utilize one tool out of the whole package or array of tools you purchased.
I am going to show you where to get high quality analogs for the most commonly used sculpting tools...and I bet you own them already. I am going to tell you briefly what you can use these tools for. Playing with them will teach you what they will do and what they won't do.
When I first started sculpting, there were no craft stores within 100 miles from my house, plus I was as broke as a old toy. My sculpting tools consisted of my hands, and these first two items.
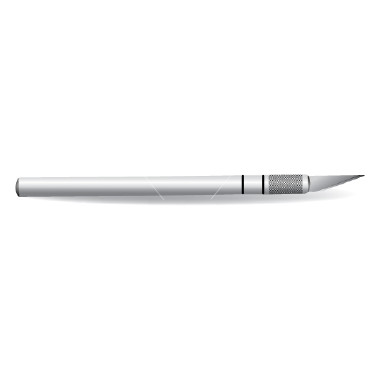
 1. X-Acto� Knife Used for trimming away excess clay, create grooves, use the flat side to make simple fish scales. If you don't own an X-Acto knife, get one: they are infinitely useful even if you never sculpt again!
Enlarge Picture showing the X-Acto knife
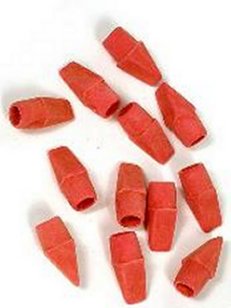
 2. Pink Pointed Pencil Eraser I super-glued the eraser to the pencil to keep it from twisting around on me. It is great for smoothing areas when you can't fit your fingers.
Enlarge Picture showing type of erasers.
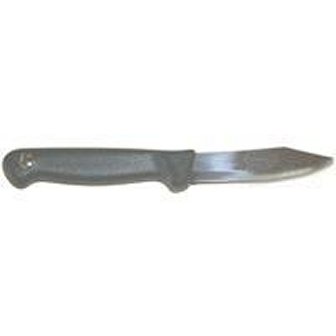
 3. Pairing Knife These work great for flattening bumpy areas and blocking out your sculpture.
Enlarge Picture showing a pairing knife for sculpting
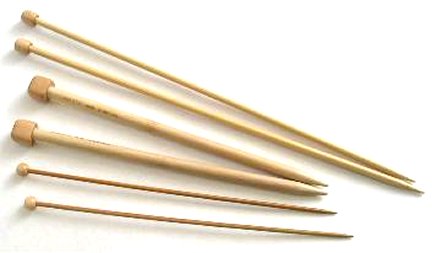
 4. Knitting Needles Great for making clothing wrinkles, shaping features on a face and making inner ear details. Wonderful for muscles, etc. I use them a great deal!
Enlarge Picture showing various sizes of knitting needles
 5. Nut Pick These are also great for clothing details as well as skin wrinkles and facial details. They work well to make fingernail details.
Enlarge Picture showing a nut pick
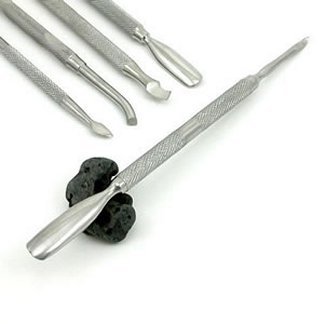
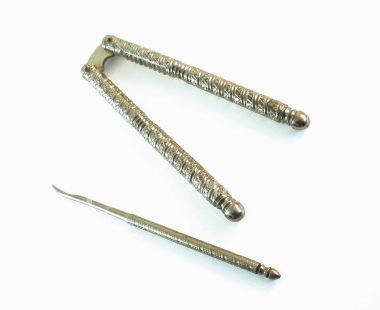
 6. Round Cuticle Pushers These are metal, but the wooden ones work well too. These are just infinitely useful. The can be used for blending, detailing, blocking (blocking means rough, early sculpting) final details, clothing details, etc, etc.
Enlarge Picture showing one type of cuticle pushers
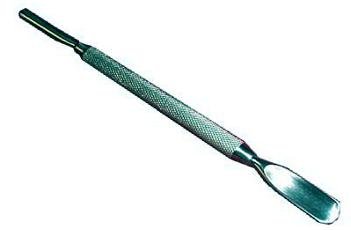
 7. Pointed Cuticle Pushers Alternate style of pusher.
Enlarge Picture showing alternate style of cuticle pushers
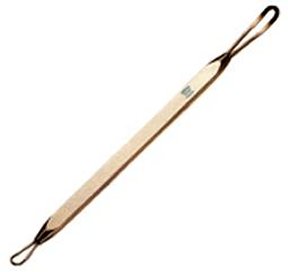
 8. Blackhead Tool Remover The remover tool has a hole or loop in the spoon-shaped tip. Great for shaving off small pieces of clay.
Enlarge Picture showing what a blackhead tool is
TIP
You should really wash these before and after you sculpt with them, especially if they are going to return to the duty for which they were originally intended.
These are great for shaping eyes, creating the curve behind the shell of the ear, and many of the same uses for which cuticle pushers are used.
 9. Filbert Brushes
A range of general-purpose bristle brushes suitable for craft work and for use with oils, acrylics and all Tempera products.
9. Filbert Brushes
A range of general-purpose bristle brushes suitable for craft work and for use with oils, acrylics and all Tempera products.
If you think you don't have one of these, look in your make-up kit! These are great for smoothing clay and blending new clay to old clay. It is a good idea to sand the paint off of the paint brush handle. Prolonged exposure to clay will eventually break down the paint and goop your hands, your clay, etc. While you are sanding, you can sand the non-bristle end of the brush into different shapes, try making a little spatula or a point, this will make your brush useful not only as a smoothing and blending tool but as a detailing tool as well!
Enlarge Picture to show various sizes of Filbert Brushes
TIP
Thus ends the tutorial on making tools. Good luck. Don't waste your money. Now stop noodling around on the Internet and go sculpt something!
Thus ends the tutorial on making tools. Good luck. Don't waste your money. Now stop noodling around on the Internet and go sculpt something!
ABOUT THE ARTIST
Tony Rice started sculpting in 1992 when his wife wanted to get a twelve inch tall Victorian Santa to use as a Christmas decoration. Tony says, "we couldn't afford it because I was going to college". So his wife asked him, "Couldn't you make one for me?" and off he went. Everyone who saw the Santa wanted him to sculpt something for them and so he spent lots of late nights and early mornings at his desk sculpting Santas, Elves, Fairies, Trolls, and anything people wanted him to make. Tony says that he thanks God every day for the skills and opportunities He has given him.
Tony is a valued member of the CDHM Forum. Visit the Galleries today.
© 2007-2012 Tony Rice
Reproduced with permission from Tony Rice. All photographs and text appearing in this tutorial are the exclusive property of Tony Rice. Permission is explicitly denied for any republication of text or photographs in this article without the prior express written consent of the author.