


Learn To Make A
1:12 Miniature Doll Dress
with Christiane Lourier
Tools and Materials Needed:
- Printed or Plain Cotton
- Bunka The color you find suit best your fabric
- Silk Ribbon: 4mm (0.16") Wide (For the belt)
- Thread: Sewing Type
- Tools
Disappearing Pencil
Fray Check: A Liquid Seam Sealant For Material & Ribbons
Glue
Needles: Sewing Type: Recommend Size 10)
Pins (Silk Pins Recommended)
Scissors: Small
Syringe To Disppense Glue Or Glue Dispenser With Very Fine Tip
Tweezers: Curved Point
COMMENT
Make sure your fabric and silk ribbon are properly ironed and various pieces of the pattern fray checked, if necessary.
I make this dress by gluing but every time I write glue you can read sew, if you prefer. If you use glue, please make sure you use it sparingly - It is better to use tiny dots to start with, most of the time you will find out it is enough. The dress can either be used to put on a hanger or can dress a doll. It will just need your proper adjustments to fit your doll.
We will start with the top of the dress.
 1. Getting Started
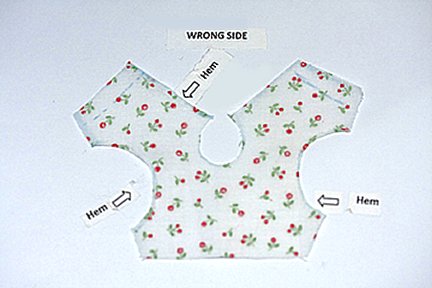
Starting on the wrong side of the fabric glue a small hem around armholes. Then glue a small hem on the left side of the middle back.
Click here to enlarge image
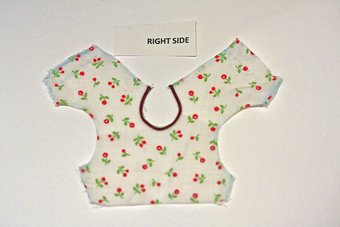
 2. On the right side of the fabric glue the bunka around the collar. Do not unravel the bunka.
Click here to enlarge image
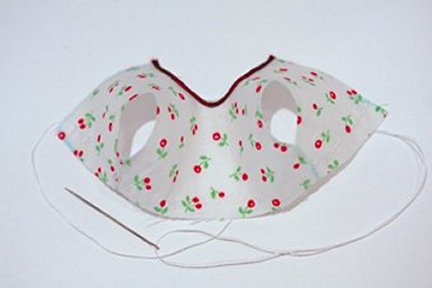
 3. Now put the right sides together. Glue the side seams under the arms. Then run a gathering thread at the waist, on the line indicated on the pattern.
Click here to enlarge image
 4. Preparing The Ruffles
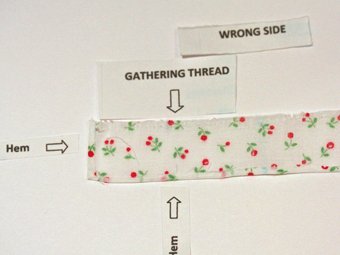
This step will apply for each ruffle.
Working on the wrong side of the fabric, glue a small hem at the bottom and at the left end of the ruffle.
Pass a gathering thread at the top side.
Click here to enlarge image
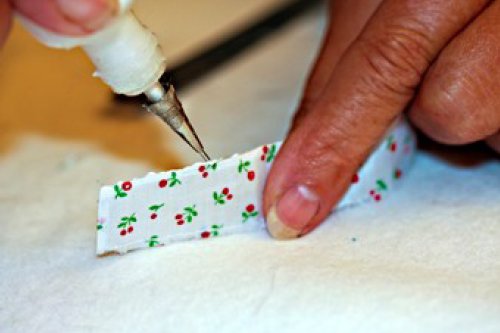
 5. Pass a fine line of glue at the bottom hem of your ruffle.
Click here to enlarge image
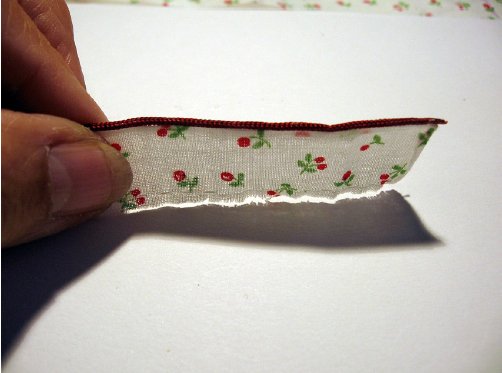
 6. Press your bunka against the line of glue, holding the ruffle between two fingers. You can also do it, flat on your table right side of the fabric towards you. Choose the way you feel more comfortable with.
Click here to enlarge image
 7. Preparing The Skirt
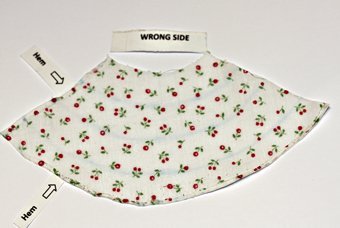
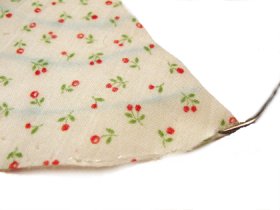
Working on the wrong side of the fabric, glue a small hem along bottom and left side of the skirt.
Click here to enlarge image
 8. To glue, use a pointed tweezers to form the hem. The picture shown is the hem of the skirt, but proceed the same way for whatever hem you are making.
Click here to enlarge image
COMMENT
Before you begin the next step, you will need to prepare for putting the ruffles on the skirt.
Working on the right side of your fabric, with your disappearing pen, mark lightly the three rows where will be the ruffles. They are 1.5cm apart. (5/8"). Divide the first line, (bottom one) in four mark them A, B, C. We will start with the top of the dress.
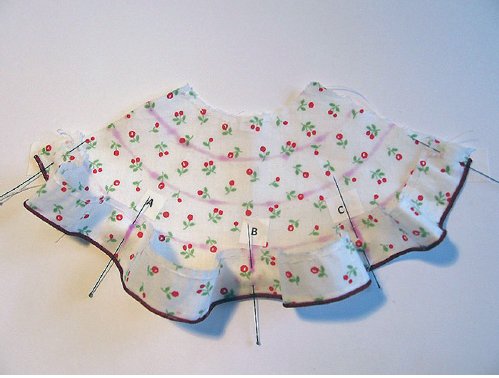
 9. Begin with the bottom ruffle, the longest ruffle. The same way you did with the skirt ruffles lines, divide the ruffle into 4-parts, and mark the A, B, C, points as shown on the above picture. Pin both ends of the ruffle at both ends of the line on the skirt. Adjust points A, B, and C, on both skirt and ruffle so that they coincide pin vertically.
Click here to enlarge image
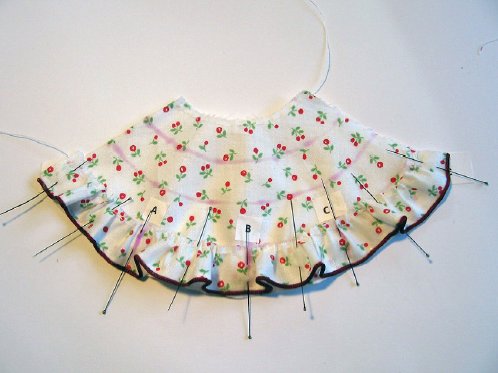
 10. Holding your work with one hand, pull slowly your gathering thread until the right dimension is reached. Apply a few more pins to consolidate, arrange your gathers, when you are satisfied with the result, secure your gathering thread.
Click here to enlarge image
 11. Gluing the Ruffles
You can now take the pins out. Begin gluing your ruffle starting from one end to the other. Your gathering thread should be placed right on your pen line. Make sure you leave 1/8 unglued section on both ends. This is to leave free space when you want to close the back seam of the skirt.
For each row of ruffles:
· 1st row: Apply the same procedure for the next ruffle, size 25cm (9 3/8")
· 2nd row: Apply the same procedure for the next ruffle,size 18cm (7")
· 3rd row: Apply the same procedure for the next ruffle size 15cm (6")
Click here to enlarge image
 12. Assembling The Bodice To The Skirt
Mark the middle of the skirt waist line and the middle of the bodice front. Place pins at both ends of skirt waist and bodice, as well as in the middle of both skirt and bodice.
Click here to enlarge image
 13. Pull slowly the gathering thread of the bodice until the right dimension. When you are satisfied, secure your thread take the pins off and glue the skirt on the bodice, along the gathering line.
Click here to enlarge image
 14. Glue your 4mm (.15") silk ribbon around the waist, leaving some ribbon on both ends to ease up the final fitting. The surplus can be cut later.
Click here to enlarge image
 15. Closing The Skirt
Now this step is a little tricky. You want to close the skirt by gluing the back seam.
Working on the right side, you apply a fine line of glue on the unhemmed side of the back of the skirt - you then push the other side against it . I have shown the process with only one ruffle on the skirt, so as to make it easier to photograph only. Do not forget, you glue only the skirt, not the ruffles right now.
Click here to enlarge image
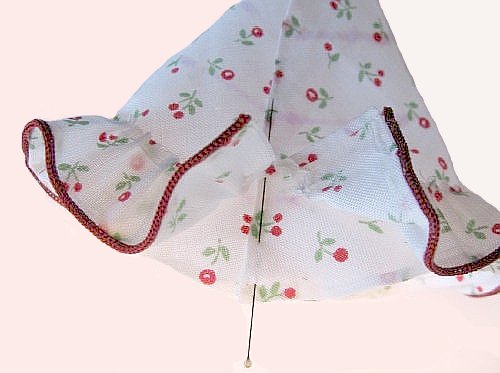
 16. Closing Off The Ruffles
Starting with the upper ruffle (not like the picture which shows the bottom ruffle), lift the hemmed side of the ruffle, pass a fine line of glue and glue it to the other end of the ruffle.
Click here to enlarge image
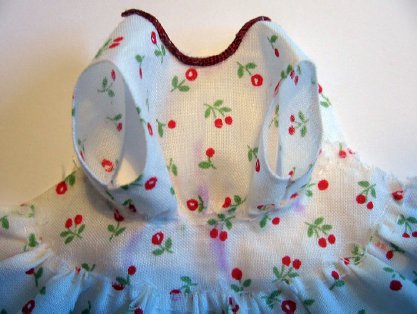
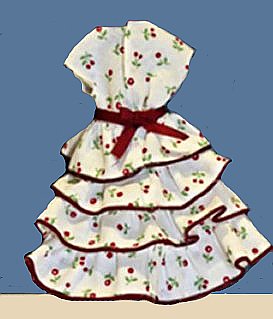
 17. Completed back of the dress.
Click here to enlarge image
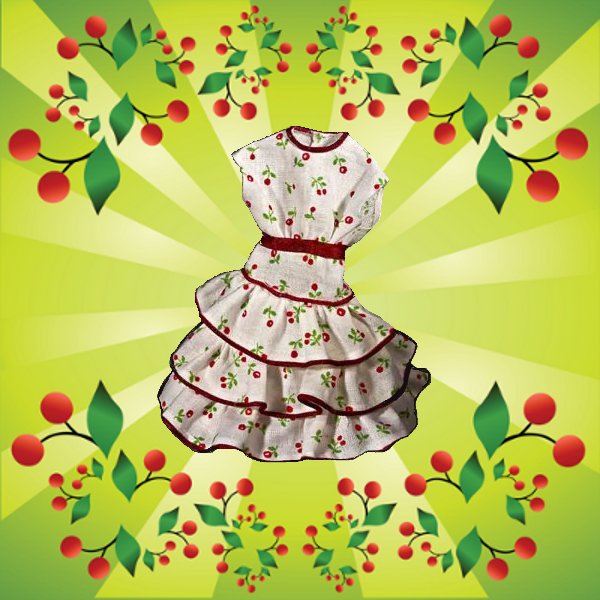
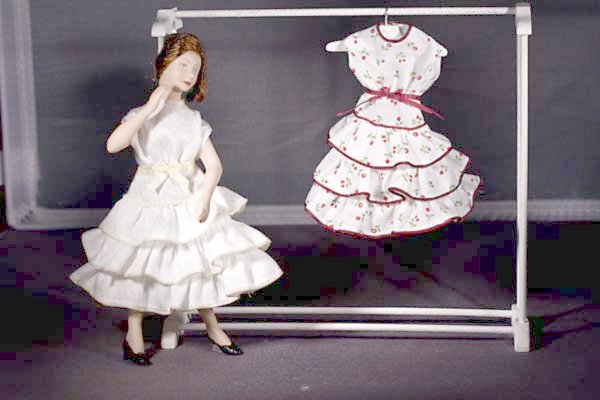
 18. Congratulations, you are finished. Here is the artisan's display of the finished dress.
Click here to enlarge image
MEET THE ARTISAN
.jpg)
Chris Lourier live's and works in a dream house in a dream environment, located in the south of France, in Provence a few miles from St Tropez. It was built on the site of an old water mill, using its foundations the building dates back to the mid 14th century - They still have the vaulted rooms with the millstone, and the axis linking it to the water turbine below.
This is where Chris makes her miniatures, entirely by hand. Her passion started from having built a dollshouse from a kit. From there, the rest is history. Chris makes a multitude of miniatures, from beautiful ceramics: plates and dishes, teapots and majolicas, Provence jugs and pitchers to highlight your dolls house. She also knits, sews dresses and makes leather hand bags.
Visit the CDHM Gallery of Artisans
©
2009-2013 Christiane Lourier
Reproduced with permission from Christiane Lourier. All photographs and text appearing in this tutorial are the exclusive property of Christiane Lourier. Permission is explicitly denied for any republication of text or photographs in this article without the prior express written consent of the author and www.CDHM.org
Reproduced with permission from Christiane Lourier. All photographs and text appearing in this tutorial are the exclusive property of Christiane Lourier. Permission is explicitly denied for any republication of text or photographs in this article without the prior express written consent of the author and www.CDHM.org
BACK
Copyright © 2004-2012
Custom Dolls, Houses & Miniatures / CDHM
Custom Dolls, Houses & Miniatures / CDHM