


Learn To Sculpt
A Polymer Clay Rose
by Aleah Klay
Materials Needed
- Polymer clay
- 30 gauge wire
You can find it in the floral or jewelry section in an arts and crafts store.
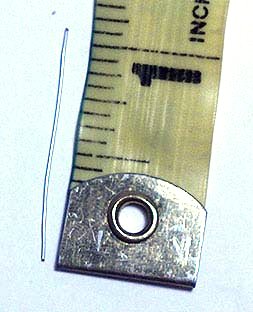
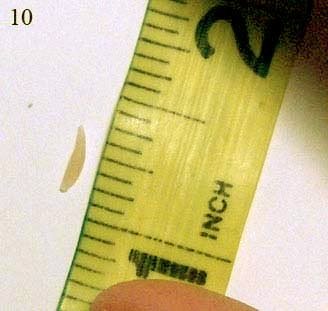
 1. Cut a piece of wire one (1) inch long.
Enlarge picture showing size of wire.
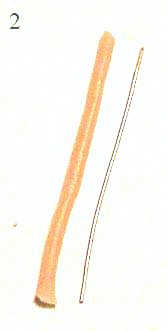
 2. Take a bit of clay. Roll it into a skinny snake shape the length of the wire.
Enlarge picture showing size of polymer to fit wire.
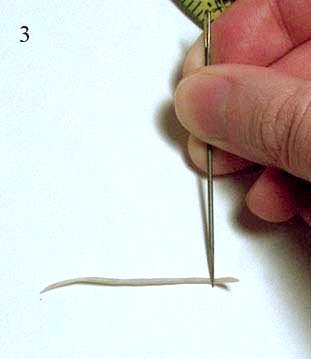
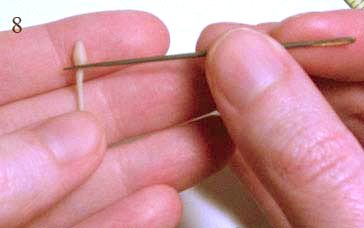
 3. Now you need to combine the wire piece and the clay length. Flatten the clay then roll the wire into the clay using your needle tool. The clay will naturally roll up.
Enlarge picture showing how to combine wire and clay.
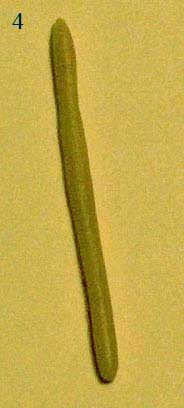
 4. You can make the clay as thin as you desire.
Enlarge picture showing rolling the clay.
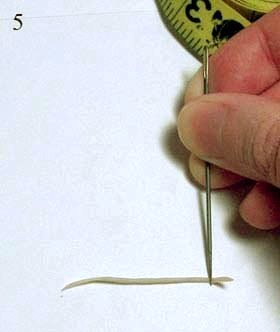
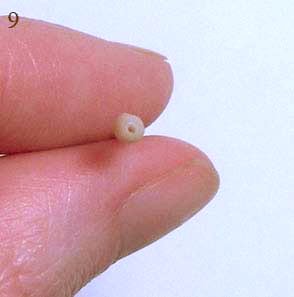
 5. Then cut any excess clay from the wire when you have the thickness you like.
Enlarge picture showing where to cut excess clay.
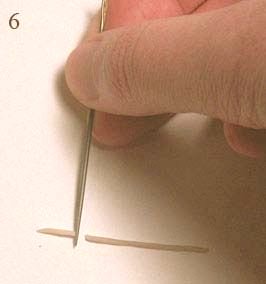
 6. Cut off excess on both ends.
Enlarge picture showing where to cut excess clay on both ends.
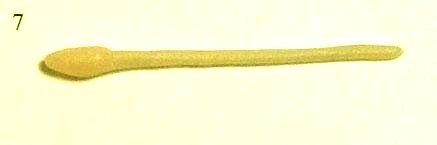
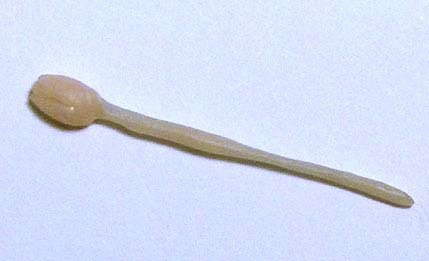
 7. Now create an egg shape. This will be the rose bud. Place it on the stem.
Enlarge picture showing how to create the rose shape.
 8. Blend it onto the stem using your needle.
Enlarge picture showing blending.
 9. Take your needle tool and poke a hole in the top of the rose.
Enlarge picture to show hole at the top of the rose.
 10. Using your needle tool create lines in the rose to define the petals.
Enlarge picture showing how to define rose petals.
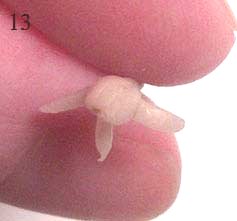
 11. Create three tiny half moon oval shapes. This will be the leaves.
Enlarge picture showing the leaves.
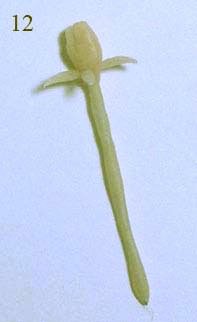
 12. Place those pieces under the rose bud and around the rose stem.
Enlarge picture showing the leaves attached.
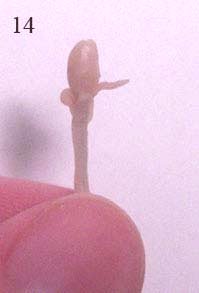
 13. Blend them onto the stem using your needle.
Enlarge picture on how to attach and blend the leaves.
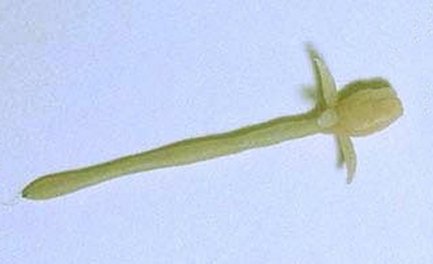
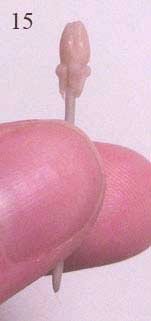
 14. Using your needle tool bend and shape each leaf.
Enlarge picture showing another angle of blending.
 15. Place the rose on a ceramic plate and bake at 275F (130C) for 15 minutes. Remove, let cool.
Enlarge picture showing final step before baking.
MEET THE ARTIST
 Aleah is a self-taught artist and lives in Salt Lake City, UT. She says that she has been messing around with all kinds of different mediums for as long as she can remember. She loves creating mixed medium three-dimensional pieces. Aleah only creates original works, never using molds, nor has she ever made molds of her original pieces.
Aleah explains, "I guess I have a wild imagination. A Blue Jay will fly past me and I'll imagine a faery on it's back. I'll imagine music while on a walk on lazy days in the Avenues. Of course there is a ghost in the attic of the house next to my apartment, viewable from my kitchen window. Any over-grown yard is a house under attack; and no doubt there are some witches in these old homes. One day I may turn out to be one of them. Some of my other interests include writing, stop motion animation, and independent film. Hopefully some day I'll get some movies made!
--There is a world where smoke is a ghost-like demon, trees run, animals think and feel as we do. Insects and faeries are Allies. Dragons can be as small as a coin or as big as a castle. Mr. Grim reaper is a familiar face. Death is just a portal to another place, and life is as real as a dream. It is my world--"
Aleah is a valued member and Moderater of the CDHM Forums and has a CDHM Gallery that you can visit here.
Aleah is a self-taught artist and lives in Salt Lake City, UT. She says that she has been messing around with all kinds of different mediums for as long as she can remember. She loves creating mixed medium three-dimensional pieces. Aleah only creates original works, never using molds, nor has she ever made molds of her original pieces.
Aleah explains, "I guess I have a wild imagination. A Blue Jay will fly past me and I'll imagine a faery on it's back. I'll imagine music while on a walk on lazy days in the Avenues. Of course there is a ghost in the attic of the house next to my apartment, viewable from my kitchen window. Any over-grown yard is a house under attack; and no doubt there are some witches in these old homes. One day I may turn out to be one of them. Some of my other interests include writing, stop motion animation, and independent film. Hopefully some day I'll get some movies made!
--There is a world where smoke is a ghost-like demon, trees run, animals think and feel as we do. Insects and faeries are Allies. Dragons can be as small as a coin or as big as a castle. Mr. Grim reaper is a familiar face. Death is just a portal to another place, and life is as real as a dream. It is my world--"
Aleah is a valued member and Moderater of the CDHM Forums and has a CDHM Gallery that you can visit here.
© 2007-2012 Aleah Klay
Reproduced with permission from Aleah Klay. All photographs and text appearing in this tutorial are the exclusive property of Aleah Klay. Permission is explicitly denied for any republication of text or photographs in this article without the prior express written consent of the author.