December 2010, Issue 11
Tools
Page 87
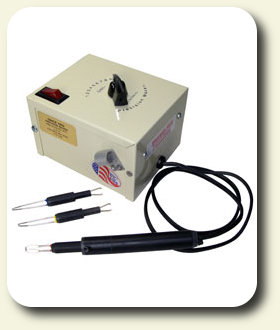
 To give you an example of how the wax pen works, pretend you have a basic polyclay face sculpt and are detailing it now. Let's say we are making the nose, adding little tiny bits of clay and using a tool to blend them in to make, say, nostrils. This same scene using wax would go like this: take a little chunk of
wax, and, using the tip of the wax pen, melt it onto the face forming the basic nose shape. Now melt a small bit of wax on the tip by plunging it into a block of wax, and you can use the pen to almost draw on the drip of wax to form a nostril.

 If you notice one cheek needs to be raised to match the other side again you melt some wax on the tip and apply it to the cheek area. Apply the tip to the dripped blob again to melt that area, moving the tip around like a brush until both cheeks are equal. Then take a metal loop tool and smooth it out further until you never would have known wax was added.
For eyebrows, draw out a drip of wax in the shape of the brow and use your hand tools to scrap it into shape. Did it wrong? Scrape it off and try again, with no worry about messing up the perfect eye you spend a half hour on below it because the wax is hard in seconds. You can use firm pressure on it just seconds after it has cooled without worrying about messing up your work.
The wax can be sanded as well to smooth large areas. Sandpaper clogged with wax? Heat it with a heat gun and daub it with a paper towel and most of the wax is gone, leaving you with a usable piece of sandpaper.
Custom Dolls, Houses & Miniatures / CDHM


